Welome to Swytch University. Here you will learn all things digital marketing and WordPress-related items.
Today we will learn to add a CSS file to your WordPress theme.
How to add a CSS file to your theme
Sometimes we want to call responsive CSS from another file in our WordPress websites. In this tutorial, we will show you how to add another (extra) CSS file to your theme.
Tips before we begin:
- Make sure you are working on the Child theme and your parent theme is not active.
- Take a backup of your theme.
Uploading stylesheet (CSS file)
- Use FTP/sFTP to upload your responsive.css file. In my case, I will be using FileZilla
- Go to public_html -> wp-content -> themes and upload css file, in my case it’s responsive.css
We can add CSS in WordPress in two different ways.
- The Functions.php way
- The Header.php way
Adding stylesheet – The Functions.php Way
- Now login to your WordPress from /wp-admin/
- Go to Appearance -> Editor -> and functions.php
- After the last line in your functions.php, add the following code
add_action(‘wp_enqueue_scripts’, ‘responsive_style’);
function responsive_style() {
wp_enqueue_style(‘my-script-slug’, get_stylesheet_directory_uri() . ‘/responsive.css’);
}
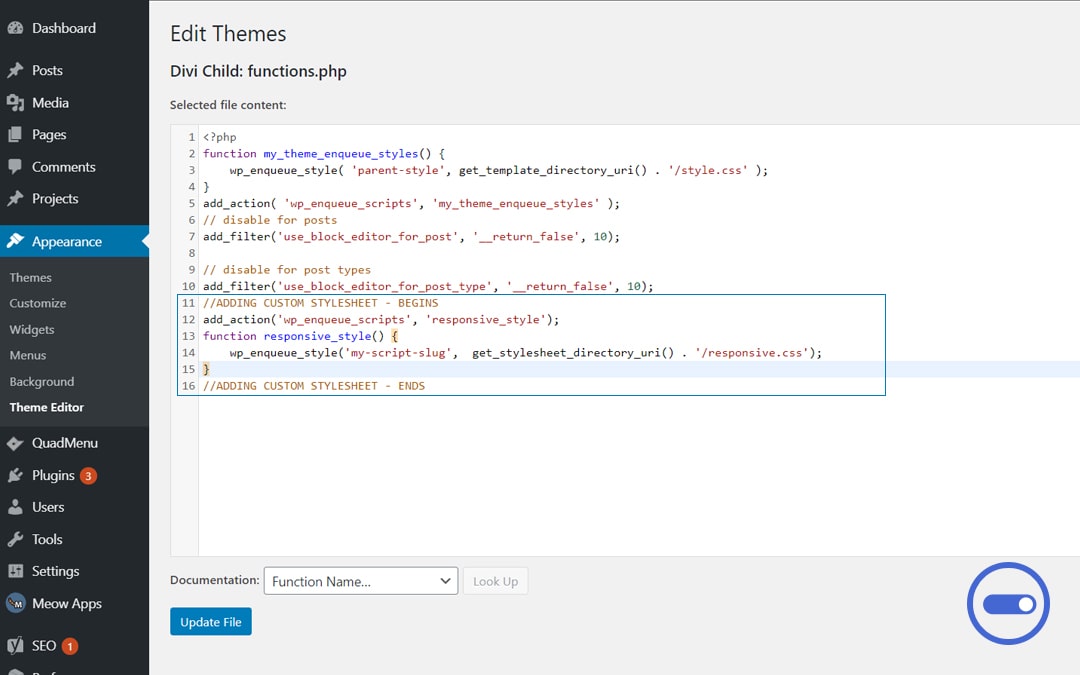
Save your functions.php and that’s all.
Adding stylesheet – The Header.php Way
- Go to appearance -> Editor -> Header.php
- Add the following code in between <head> starting tag and </head> closing tag
<link rel=”stylesheet” href=”<?php bloginfo(‘template_directory’); ?>/responsive.css”>
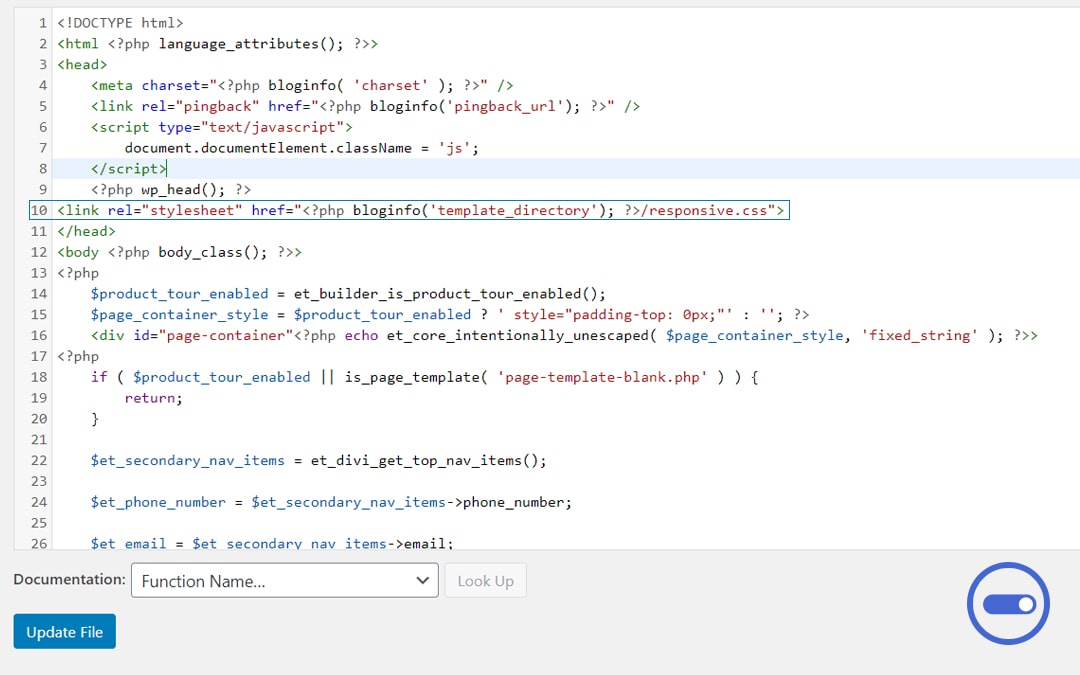
extra stylesheet responsive CSS file in the header of the WordPress
- 3. Save your header.php
Thanks for reading and we hope that this guide has helped you with your WordPress journey.
Happy Coding to everyone!